Build a Machine Learning Model API Using YOLOv5 With FAST API In 5 steps
Howdy! Today we will build a machine learning api by using YOLOv5 and FAST API.
If you have used Flask before, you will find easy to work with FAST API as it provides production-ready code with a minimal amount of tweaks.
FAST API also comes with automatic interactive documentation with OpenAPI. Apart from better developer experience, the ASGI (Asynchronous Server Gateway Interface) made FAST API become one of the fastest Python frameworks available.
What is YOLOv5?
YOLOv5 is a family of object detection architectures and models pretrained on the COCO dataset, and represents Ultralytics open-source research into future vision AI methods, incorporating lessons learned and best practices evolved over thousands of hours of research and development.
YOLO stands for “You only look once”, which is a deep learning model that is fast and efficient as it uses a single shot detector(SSD) and YOLO object detector to divide an input image into an SxS grid system.
You may see the impressive comparison below for YOLOv5:

Step 0: Prepare your Customized YOLOv5 Model
For training custom object recognition with YOLOv5, you may check out the link below:
You may proceed without this step by using my own custom ML model. The model support for detection of 6 types of food, including chicken wing, donut, french-fries, gyoza, hotdog and waffle.
Step 1: Clone or Download a Github project
Go to https://github.com/DanielChuDC/yolov5-fastapi to clone or download the project. Extract the downloaded zip file.
Directory explained:
.
├── Dockerfile # For containerised this application
├── README.md
├── main.py # The entry point of the program
├── model
│   ├── __init__.py
│   └── best.pt # Where you custom training model place
├── requirements.in # To generate requirements.txt
├── requirements.txt # Usage: pip install -r requirements.txt
├── segmentation.py # for import local yolov5 and scale image
└── yolov5 # Get from https://github.com/ultralytics/yolov5
main.py is the entry point of the application. Here we’ll define 3 endpoints and allow file upload with bytes in FAST API:
from fastapi import FastAPI, File
from segmentation import get_yolov5, get_image_from_bytes
from starlette.responses import Response
import io
from PIL import Image
import json
from fastapi.middleware.cors import CORSMiddlewaremodel = get_yolov5()app = FastAPI(
    title="Custom YOLOV5 Machine Learning API",
    description="""Obtain object value out of image
    and return image and json result""",
    version="0.0.1",
)origins = [
    "http://localhost",
    "http://localhost:8000",
    "*"
]app.add_middleware(
     CORSMiddleware,
     allow_origins=origins,
     allow_credentials=True,
     allow_methods=["*"],
     allow_headers=["*"],
)
@app.get('/notify/v1/health')
def get_health():
    return dict(msg='OK')
@app.post("/object-to-json")
async def detect_food_return_json_result(file: bytes = File(...)):
    input_image = get_image_from_bytes(file)
    results = model(input_image)
    detect_res = results.pandas().xyxy[0].to_json(orient="records")
    detect_res = json.loads(detect_res)
    return {"result": detect_res}
@app.post("/object-to-img")
async def detect_food_return_base64_img(file: bytes = File(...)):
    input_image = get_image_from_bytes(file)
    results = model(input_image)
    results.render()  # updates results.imgs with boxes and labels
    for img in results.imgs:
        bytes_io = io.BytesIO()
        img_base64 = Image.fromarray(img)
        img_base64.save(bytes_io, format="jpeg")
    return Response(content=bytes_io.getvalue(),
media_type="image/jpeg")
segmentation.py defines 2 methods:
get_yolov5(): this is where yolov5 can use the custom model. Please take note of themodel.conf=0.5, it means only those detected objects with confidence level more than 0.5 will appear in the return result.get_image_from_bytes(): is where the image resized.
import torch
from PIL import Image
import iodef get_yolov5():
    model = torch.hub.load('./yolov5', 'custom', path='./model/best.pt', source='local')
    model.conf = 0.5
    return modeldef get_image_from_bytes(binary_image, max_size=1024):
    input_image =Image.open(io.BytesIO(binary_image)).convert("RGB")
    width, height = input_image.size
    resize_factor = min(max_size / width, max_size / height)
    resized_image = input_image.resize((
        int(input_image.width * resize_factor),
        int(input_image.height * resize_factor)
    ))
    return resized_image
Step 2: Put the custom best.pt into the model folder under the project directory
After you train your custom model, you have the customs model called best.pt . Replace the best.pt at the model folder.
Step 3: Start the project by this command
Run the following command in the terminal
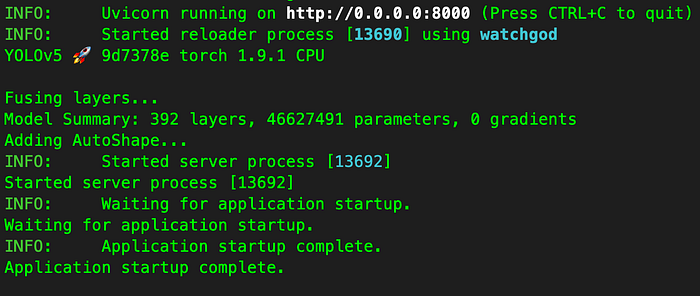
uvicorn main:app --reload --host 0.0.0.0 --port 8000If you see the similar result below, it means successfully launching the project.
You may install the required package by running
pip install -r requirements.txtif you encounter any error regarding missing package.
Step 4: Test the result
Navigate to http://0.0.0.0:8000/docs#/ in your browser. You should see the Open API scheme which have 3 endpoints:

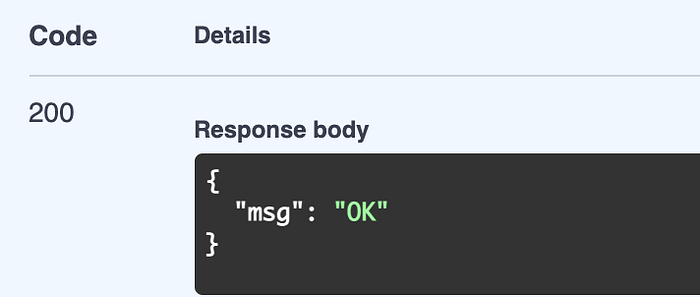
/notify/v1/health— This endpoint is for checking Kubernetes’sreadinessProbeandlivenessProbe.
You can execute the endpoint by clicking the try it out button.
Expected result is
{"msg": "OK"}with 200 status code.
2. /object-to-json — This endpoint is for returning the detected object value with the JSON format
You can execute the endpoint by clicking the try it out button and upload an image.
Expected result is
{"result": []}with 200 status code. If the model detected something with more than 0.5, it will append in the array.

Note: If you have used your customs
best.pt, the detected object might be different.
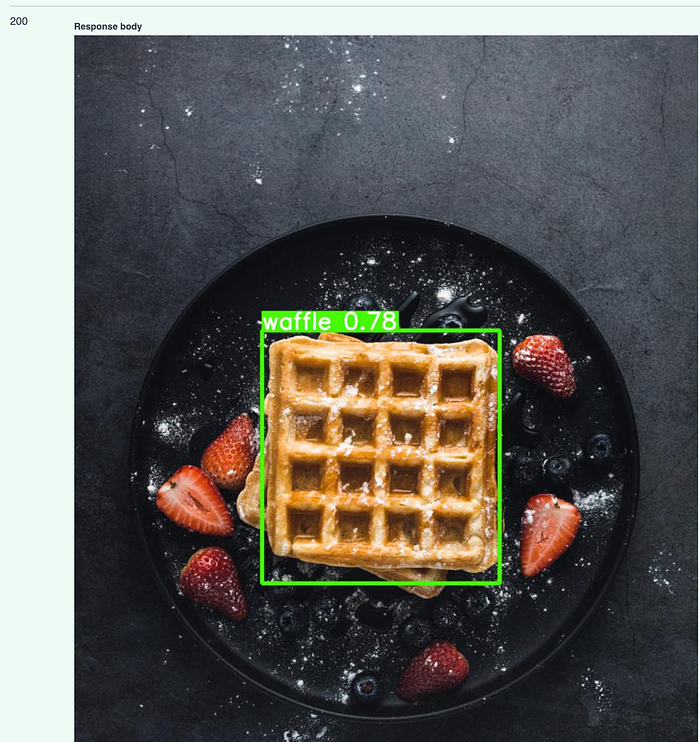
3. /object-to-img — This endpoint is for returning the detected object value with image format
You can execute the endpoint by clicking the try it out button and upload an image.
Expected result is an labelled image with detected food object with 200 status code. If the model detected something with more than 0.5, it would appear with a label and box.
Note: If you have used your customs
best.pt, the detected object might be different.
Step 5: Build this project into a container image for microservice
We have come so far! Let us build this project into a container image.
Open docker desktop and wait for it to become ready.
Dockerfile
FROM tiangolo/uvicorn-gunicorn:python3.9-slim
LABEL maintainer="danielchu"ENV WORKERS_PER_CORE=4
ENV MAX_WORKERS=24
ENV LOG_LEVEL="warning"
ENV TIMEOUT="200"
RUN mkdir /yolov5-fastapi
COPY requirements.txt /yolov5-fastapi
COPY . /yolov5-fastapi
WORKDIR /yolov5-fastapi
EXPOSE 8000
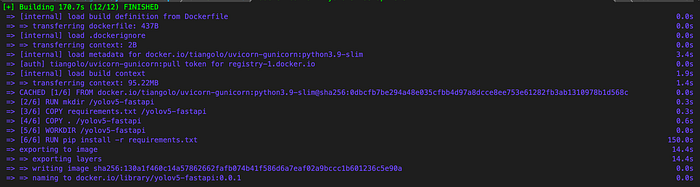
CMD ["uvicorn", "main:app", "--host", "0.0.0.0", "--port", "8000"]Now build the image by running
docker build -t yolov5-fastapi:0.0.1 .If you see the result similar to the screenshot below, the image has been built successfully!
You can run the container image by
docker run -p 8080:8000 yolov5-fastapi:0.0.1Conclusion
In this article, we have created a machine learning model API by using YOLOv5 and FAST API. This application will suit object detection by allowing you to upload images and get back results in JSON or image format.
This application is also suitable for cloud deployment by using the container image.
We can further enhance this project by storing the detected result into a database for machine learning improvement. But that’s a story for another time.
If you are interested in building an authentication api using FAST API, you may check out the link below:

